I’d been hosting my site with Siteground for a number of years and in all honesty had a really good experience with them. However I’d been thinking about starting a new site and didn’t want to have to immediately double my hosting spend. I knew if I migrated my WordPress website and email to Cloudways I’d be paying for a cloud server rather than shared hosting, and that would give me the flexibility to host more than one site on the server. I’ve written this Cloudways hosting review to share the experience honestly, the good and the bad.
I completed the process of moving my WordPress website from Siteground to Cloudways and wrote this Cloudways hosting review to share the details, good and bad. My email was hosted with Siteground too, so I needed to set up Cloudways email hosting.
Although there is no ‘Cloudways mail’ service specifically, there is a third party service available and I’ve covered the set up below.
Table of contents
- The steps to migrate WordPress website to Cloudways
- Sign up to Cloudways Hosting
- Set up the Cloudways server
- Migrate the WordPress site to Cloudways
- Point your domain name at your new hosting space
- Set up SSL Certificate
- Cloudways email hosting
- Cloudways hosting review summary
- FAQ’s
- An update, one year after migrating to Cloudways
The steps to migrate WordPress website to Cloudways
I’ve broken this hosting review down into steps so you can dip in and out as you work your way through the process of moving your website to Cloudways.
- Sign up to Cloudways and configure your server / hosting space
- Create your application
- Migrate database and files to Cloudways
- Refine the website set up by configuring caching, SSL etc
- Update DNS record to point domain name to new host
- Move email hosting if required
Sign up to Cloudways Hosting
This is obviously the first step and like everything else in the process I found this quick and easy. Click here to sign up to your FREE trial with Cloudways – it really does only take 5 minutes and you get a free trial for a week. All the user interfaces are clear and I never felt like any stage was difficult or that I had to search to find the information I needed.
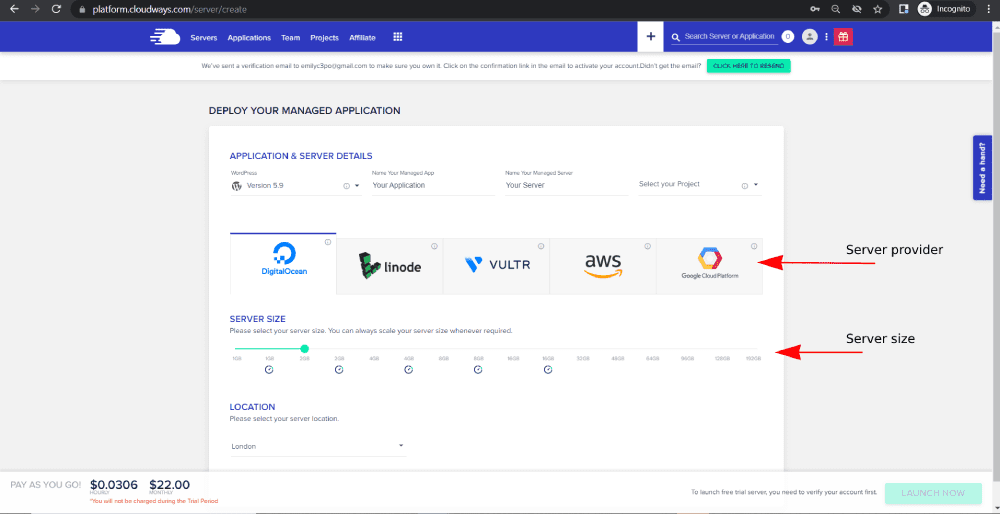
Once you’ve provided your info (name and email address) you’ll need to choose which server infrastructure provider you want. I chose Digital Ocean and left the server size on 2GB.
Lastly you need to chose a server location. The general rule of thumb here is to choose the location closest to your target customers so that they benefit from the fastest response times. If you’re going to be hosting a ‘niche website’ from which you want to earn from display ads, then you’ll probably want to choose a US location, as that’s where most of the ad income comes from.
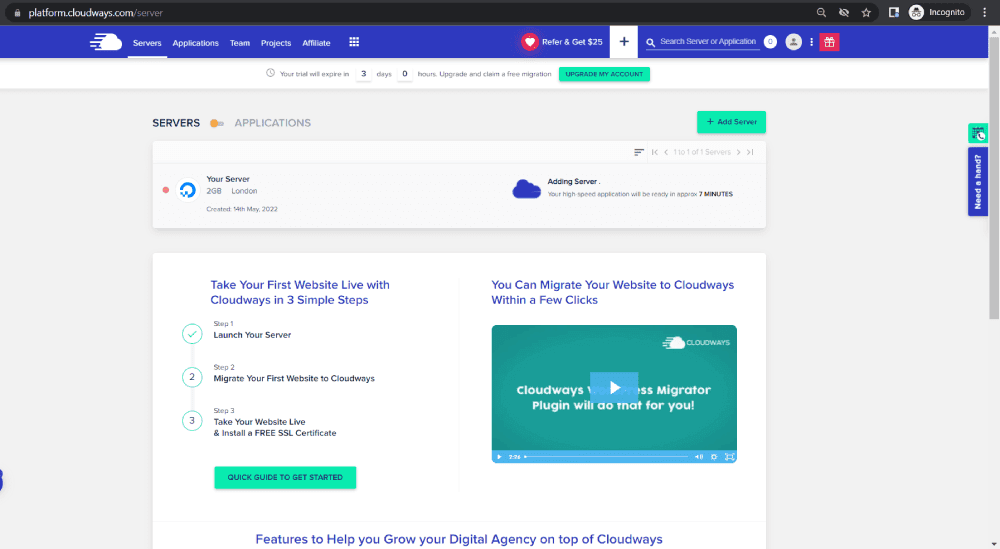
Once you’ve verified your email you click the ‘Launch Now’ button and you’ll then see this screen showing you your server. You can see in this image that mine took 7 minutes to be ready for me to use!
Also take note that the lower two thirds of screen is information provided by Cloudways which links to all the info you will need to complete the process to migrate your WordPress website to Cloudways.
Set up the Cloudways server
Once the server’s set up, click on it to see all the settings.
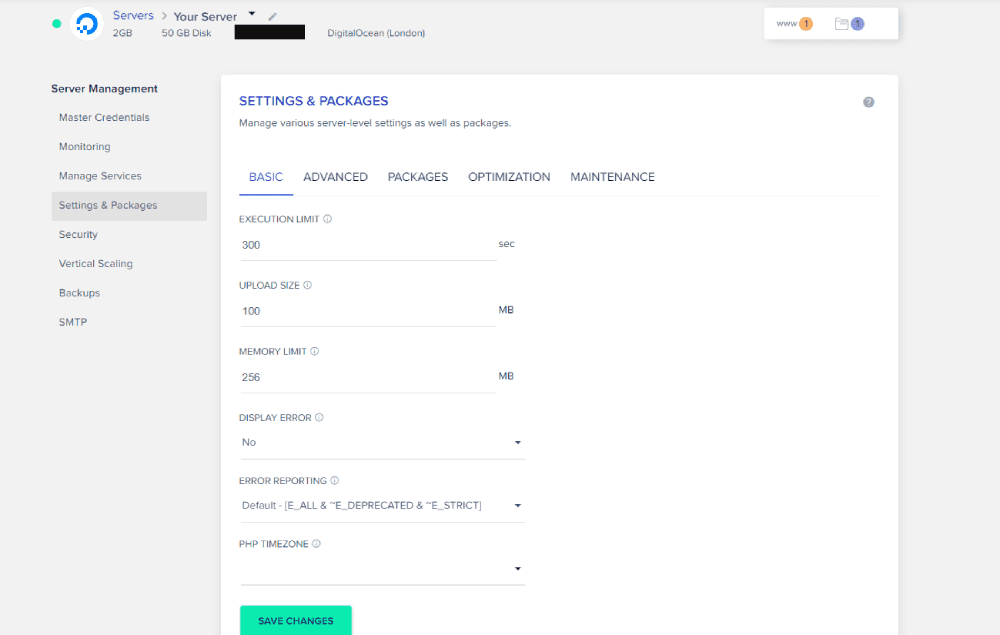
Set your timezone, adjust the memory allocation if required, make sure the PHP version is what you require. You can always come back and adjust these settings later if you need to.
Create the Application in your Cloudways server
One of the key differences between the shared hosting account I had at Siteground and this type of hosting (a server), is that I can host multiple websites – or Applications – on the server. You add a new Application and while doing so choose which type of Application you want to add, in this case we’ll add a WordPress application. This will serve as the destination for your WordPress website when you migrate them to Cloudways.
Migrate the WordPress site to Cloudways
I took advantage of the ‘free migration service’ which is offered with each account, I believe they will give you up to 5 free migrations. The Cloudways support team were very responsive and clear, so after confirming all the details to them via email the migration process began. Only a few hours later I received an email saying my website had been migrated and it was available to view on a temporary staging url.
If you’d rather do the website migration yourself there is a WordPress plugin provided by Cloudways, the Cloudways WordPress Migrator plugin – which makes the process pretty simple. You can just search for it in the WordPress plugins admin area of your website (on the host you’re leaving).
Post migration checklist
When you check your website be sure to check that images and videos are showing and ensure all of your pages are present and correct. Other things to consider checking are:
- your htaccess file, make sure it is there and that the content has not changed
- your permalink structure – ensure this is the same or this could have a really bad effect on SEO
- your base url in WordPress website settings, as above, critical that this does not change for SEO
Set up Caching in Cloudways WordPress hosting
The migration is basic, by which I mean they migrate the WordPress database, all the files including images and videos but they don’t do any caching setup. In my Siteground hosting account I had spent sometime setting up an SSL certificate, and optimizing caching to make sure my website loaded quickly.
Although none of that was set up in the Cloudways migration service, I was really impressed that fairly soon after the site was set up I received a couple of emails from the Cloudways bot bringing my attention to the fact that I didn’t have those features set up, and suggesting I did so as soon as possible. These emails included links to the relevant information making the process as quick and simple as possible. I received two emails, one notifying me that I did not have SMTP switched on, and one that I didn’t have caching set up.
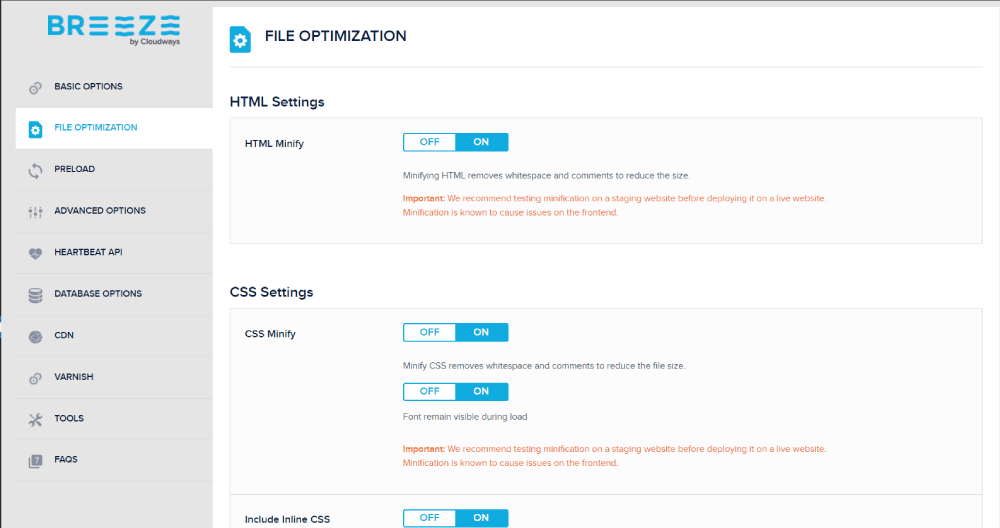
Cloudways caching plugin
They recommend using the Breeze WordPress cache plugin which they’d installed, but not enabled. Setting it up was pretty straight forward and I found fantastic articles in the Cloudways support website explaining everything, so I just followed the instructions.
Point your domain name at your new hosting space
Cloudways provide a DNS made easy plugin though I didn’t use it so can’t include any info on it in this Cloudways review. I can say I love the way they have genuinely tried to provide documentation and tools for every step of the migration process. You will need to change your DNS records with whatever company is the current registrar. This will be someone like Namecheap for instance.
People requesting your website from different locations around the world will have their request served by different nameservers. These nameservers update at different times. This means that when you change your DNS record there’s a period of time during which some people will be directed to the new host and some people will be directed to the old. When transferring your domain you can use this tool to see the changes as they happen across the globe.
What about Cloudways nameservers?
Maybe you’ve been searching for Cloudways nameservers? In fact Cloudways do not have their own nameservers as they don’t provide any DNS related services. By DNS related services I mean handling sending traffic from your domain to the Cloudways server. This should all be set up using the DNS management facility at your host company (such as Namecheap, GoDaddy, Siteground, WP Engine (with exclusive offer) etc.).
Set up SSL Certificate
Once the domain name has been pointed at your Cloudways server you can set up your SSL certificate which is free and takes only a few minutes.
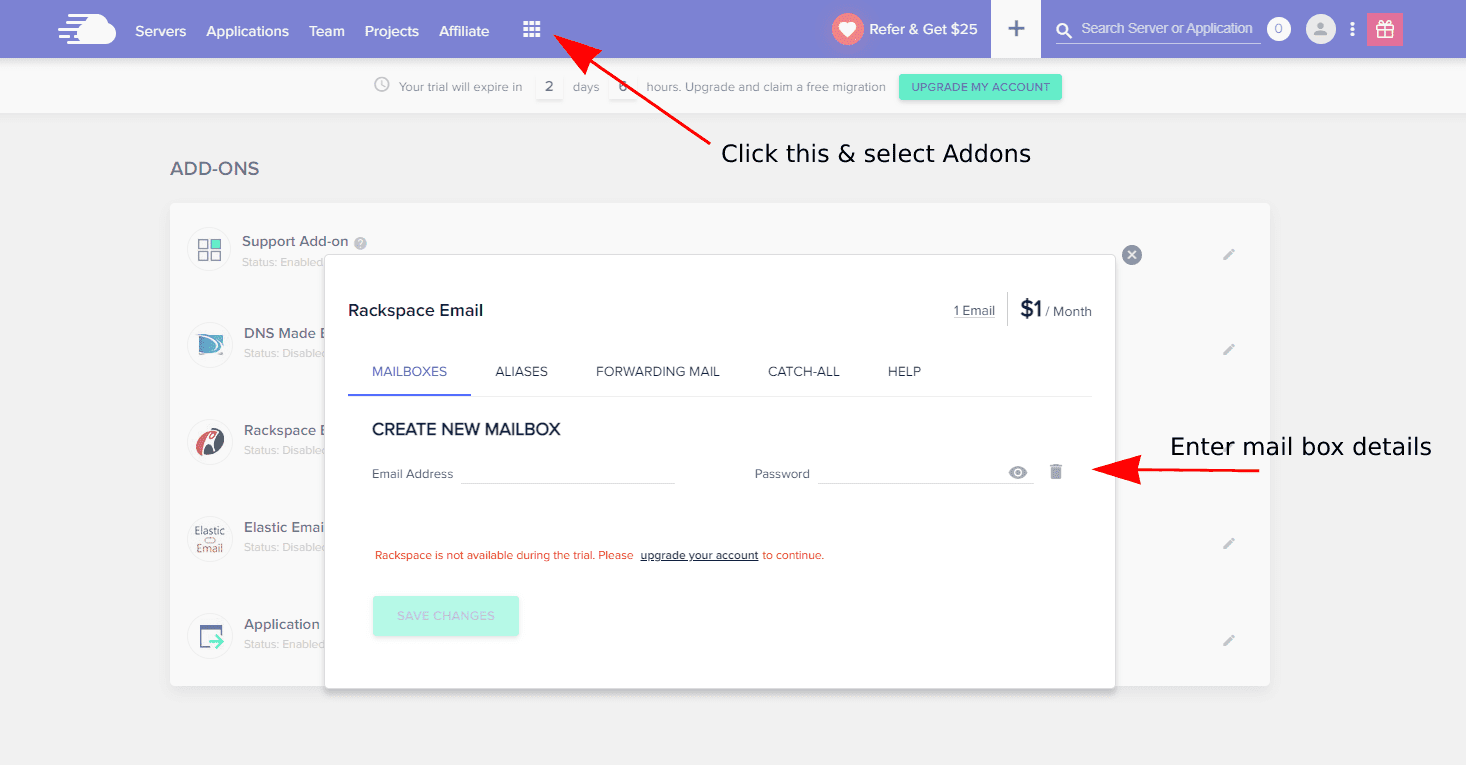
Cloudways email hosting
One consideration when you migrate your site to Cloudways is that they don’t host emails like Siteground do, so I also needed to find somewhere to host my emails. So whilst there is no such thing as ‘Cloudways mail’, there is an ‘add-on’ which let’s you set up mailboxes very simply, and the underlying service is provided by Rackspace, so I’ve included a description of the process in my Cloudways review.
If you wish to migrate mailbox data, you can use the self migration tool provided by Rackspace, or you can ask them to migrate the data for you. I’ve been using Cloudways mail provided by Rackspace for a while now and it works perfectly.
Cloudways hosting review summary
I’ll start with the positives, of which there were many. I was very impressed by Cloudways support. The support tab is available from any page, it starts as a bot, you tell it the category of your enquiry, type your question, and the bot tries to answer and gives you links. If it doesn’t help you can click a ‘talk to a person‘ button. I used this many times and every time I had a very quick response.
Cloudways support
The support provided was top notch as well, and it’s worth noting that one of the days I used support was a Sunday and the response time was the same as during the week, especially important if your website is a side project.
I found the Cloudways dashboard very clear, and love the fact they make all the information you’ll ever need very visible and easy to copy. For example your server IP address, your FTP log in details etc.
Migrate email to Cloudways
During the migration of my email to the Cloudways mail service everything appeared to work perfectly. However after a few days I realised that some of my old email data was missing. I have seen other people reporting the same, so whilst the process was smooth, if your old emails are vital then I would recommend doing a full back of your mailbox before you start and thoroughly checking after Cloudways say it is done.
Overall I would definitely recommend Cloudways as a WordPress website host. If there is anything you’d like me to add to this Cloudways hosting review then please drop me an email and I’ll do my best to accommodate. I have not regretted the move to Cloudways, and I’d recommend you migrate your site to Cloudways for sure.
FAQ’s
Cloudways is a company that provide managed cloud hosting solutions for web applications.
No. All their hosting solutions are provided on cloud based servers. You pay for a server and you can host as many websites on your server as you like.
You can, although it is a managed service provided by Rackspace.
Follow the steps in this post to complete a simple website migration to Cloudways
Cloudways do not have their own nameservers as they don’t provide any DNS related services.
An update, one year after migrating to Cloudways
It’s over a year since I migrated my WordPress website to Cloudways and so I thought it was about time I came back to update my hosting review with a report on how I’ve found the service.
I still host my website on this Cloudways server, I have had no problems at all and I’m really happy I made the decision to move! In fact I now host another website on the same server, so I’ve also saved myself some money. On a shared host like Siteground, my monthly bill would have doubled – mine has, in effect, halved.
My email service has been great too – no downtime issues and I appreciate the webmail interface provided by Rackspace.
In fact the only change I’ve made is that I no longer use the Breeze plugin, I now use WP Rocket which I preferred and personally got better site loading speeds from.
